

How To Update Bios B450 Aorus Elite
FEATURED
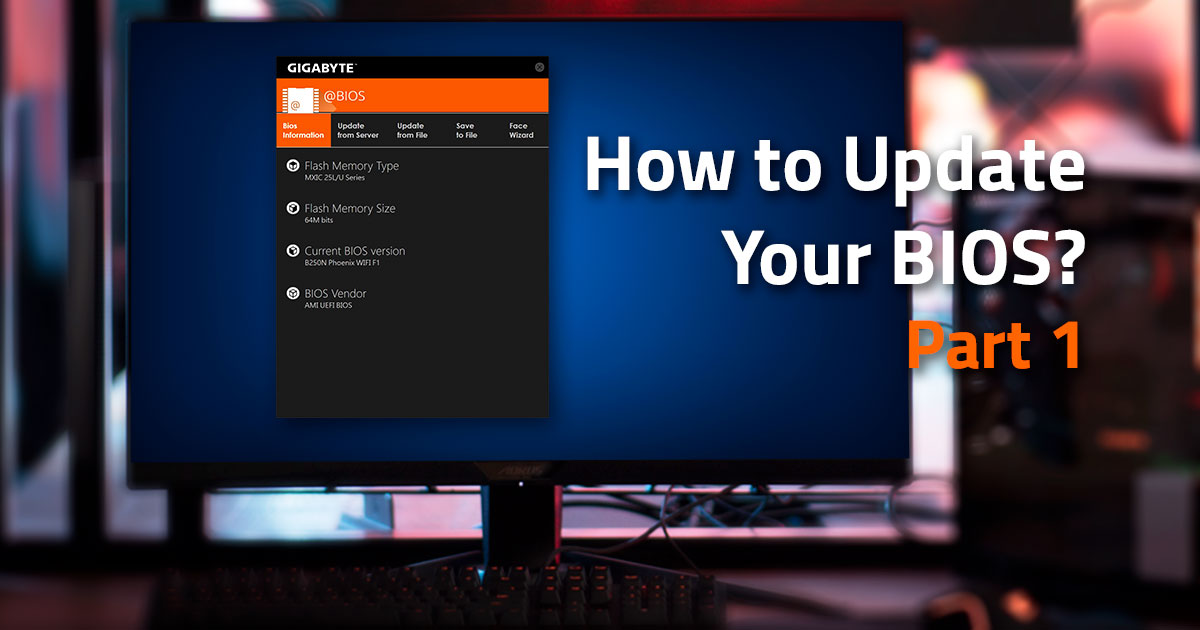
How to Update Your BIOS
Part i:The @BIOS Utility
- #AORUS #Motherboard #BIOS
So, you lot've purchased yourself the brand new Z390 AORUS Ultra motherboard to become into your new beast of a gaming rig. The motherboard is installed, the RTX 2070 is hooked upward and set up go, and your corking to jump straight into some CS:GO to start laying down the law to those that oppose you.
Withal, it's not quite time to spray and pray simply however. In that location is even so one more crucial slice of the puzzle before your new build is complete. The dreaded BIOS update… Ok, that's probably a little overdramatic, but there was a time that BIOS updates were the cause of pain for many PC users. A time where it was very common to see computers failing to boot because of problems from flashing the BIOS.
Ensuring that your motherboard has the latest BIOS installed is crucial to the performance of your computer, and the AORUS BIOS update utility makes the entire process very simple equally well as very rubber.
This 2 Part series will cover why information technology's important to keep the motherboard BIOS update to date, how simple is to do and then, and what to do if things go wrong.
The importance of keeping your bios up to date
At that place are a couple of key reasons why you lot should exist running the latest BIOS version for your motherboard that ensures that it keeps running at superlative operation.
Hardware compatibility
New hardware and technology are being developed daily when it comes to computing. Before you take had a chance to reach the level cap in your game, the latest GPU, CPU, or storage technology has already been released.
The problem with an ever-evolving tech landscape is that compatibility issues tin arise for hardware that you are already running on your PC. This is where BIOS updates come in.
BIOS updates allow companies such as GIGABYTE to roll out compatibility updates to our existing PC to provide compatibility for the latest hardware. This ways that you don't demand to buy a new motherboard every couple of months just because a new slice of hardware has been released.
Stability and operation improvements
Like with all things, applied science isn't perfect. At that place are times when bugs find their way in which can cause issues for you. The beauty of this is that these problems are very oft easily resolved past a simple flashing of the latest BIOS.
BIOS updates come packed with fixes for stability or performance issues, allowing you to squeeze every ounce of performance from your motherboard and your gaming PC.
Updates for Security
Above all else, the near important aspect when it comes to computers is security. The concluding thing anybody needs is someone gaining unauthorized access to your figurer or home network and acting maliciously.
Manufacturers can push updates to your motherboard to close whatsoever holes that may be nowadays that could be targeted by attackers. One quick BIOS update could mean the departure between having your computer compromised or not.
The easiest way to update your motherboard BIOS with @BIOS from GIGABYTE AORUS
Gone of the days of having to manually flash the BIOS cheers to @BIOS.
This BIOS update utility was adult by GIGABYTE to make is incredibly simple to update your BIOS to the latest version. All it takes is a few steps.
Step 1: Download and install the GIGABYTE APP Center
The outset pace is to download and install the GIGABYTE APP from the GIGABYTE website. The APP Center allows you lot to install many different utilities to let you lot to manage your AORUS powered gaming PC fully.
The offset step is to download and install the GIGABYTE APP from the GIGABYTE website. The APP Eye allows you to install many different utilities to allow you to manage your AORUS powered gaming PC fully.
Step two: Install the @BIOS Utility
Launch the APP Center and click on the Live Update button that is indicated past the downward pointer icon at the top right of the window.

Next, click on the Non Installed tab. Here you will find a list of all the utilities and updates that can be installed.
Scroll down until you notice the @BIOS utility. Select the checkbox next to @BIOS and so click the Install button.
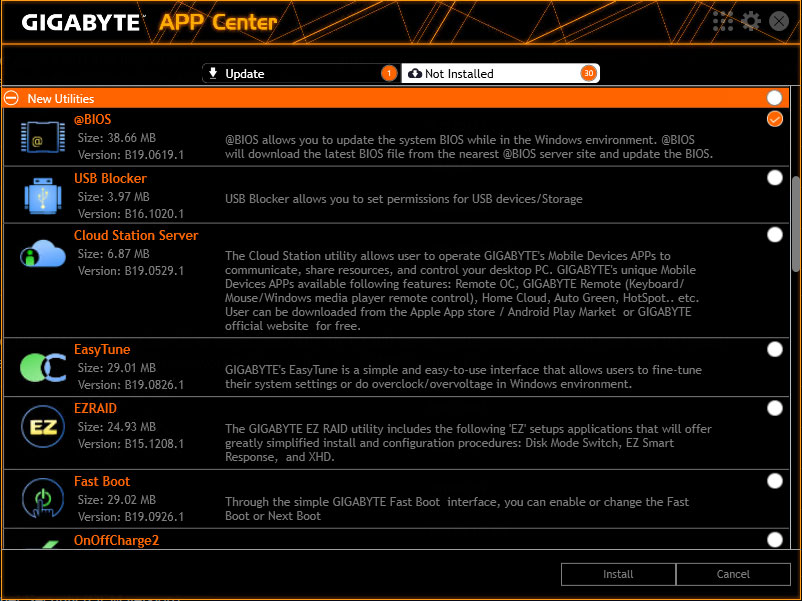
The @BIOS utility shall now begin installing.

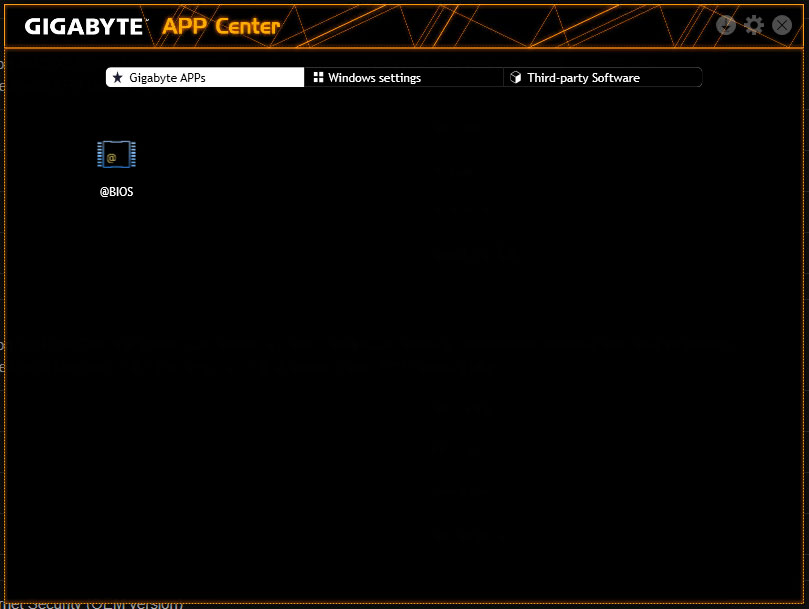
Footstep 3: Launch @BIOS
Once @BIOS has been installed, head back to the APP Center home screen where you will now notice the @BIOS icon
Click the icon to launch the @BIOS utility.
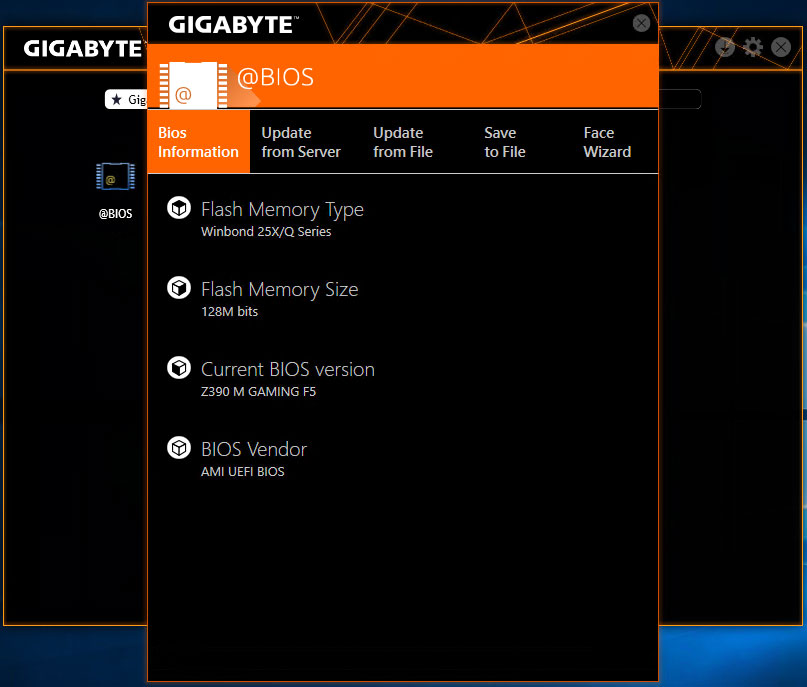
Now that you have @BIOS launched, you will run across details relating to your motherboard such equally Flash Retentiveness Blazon, Wink Retentivity Size, Current BIOS Version, and BIOS Vendor.
Yous want to become to the Update from Server tab, which is where we will update the BIOS.
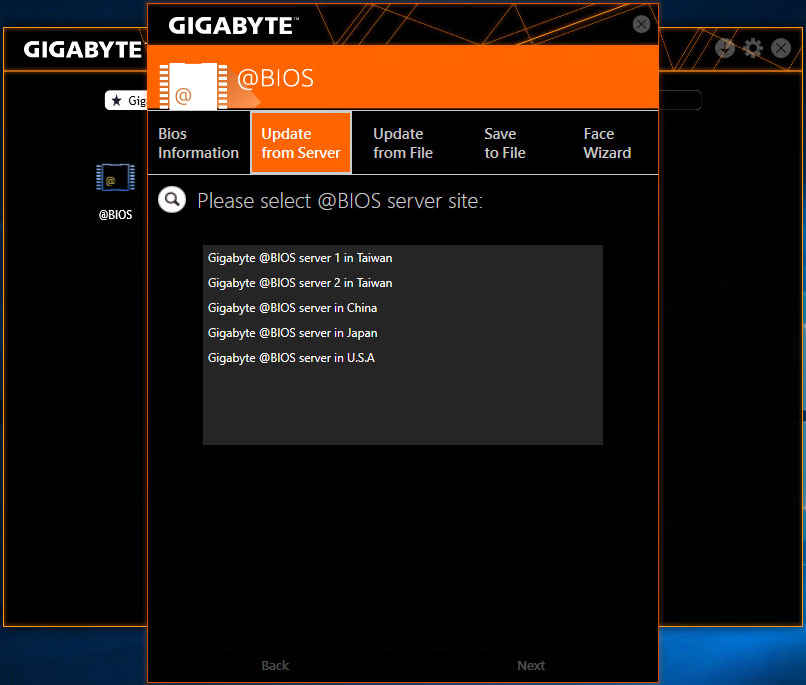
Stride 4: Select server location
Here is where y'all select where you would like to connect to update your BIOS. Select the location that best suits you.
Footstep 5: Select the BIOS update to install
Information technology is now time to select the BIOS update that you would similar to install. This is very straight forward; nevertheless, it is important to make certain that you select the right model from the list of available options.
Once you have selected the right model, click the Install button.

Footstep half-dozen: Face-Wizard (optional)
You volition be shown the Face-Wizard screen, which allows y'all to upload an alternate logo to brandish on boot. This is completely optional, and in most cases, you just need to skip this step and click the Next push button.

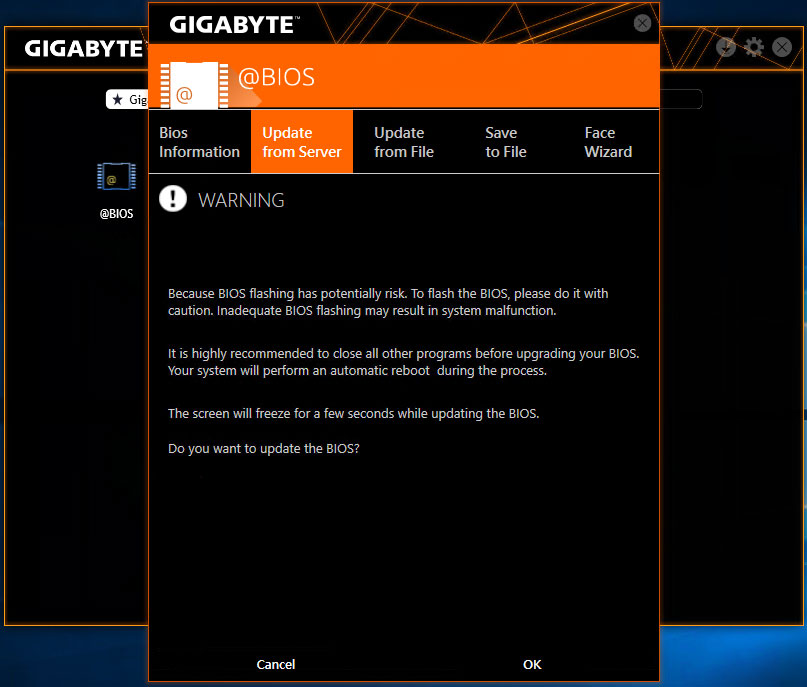
Step 7: Confirm BIOS installation
One time past the Face-Magician screen, you will be asked to confirm that you would like to go on with updating the BIOS. Click the OK button to go along.
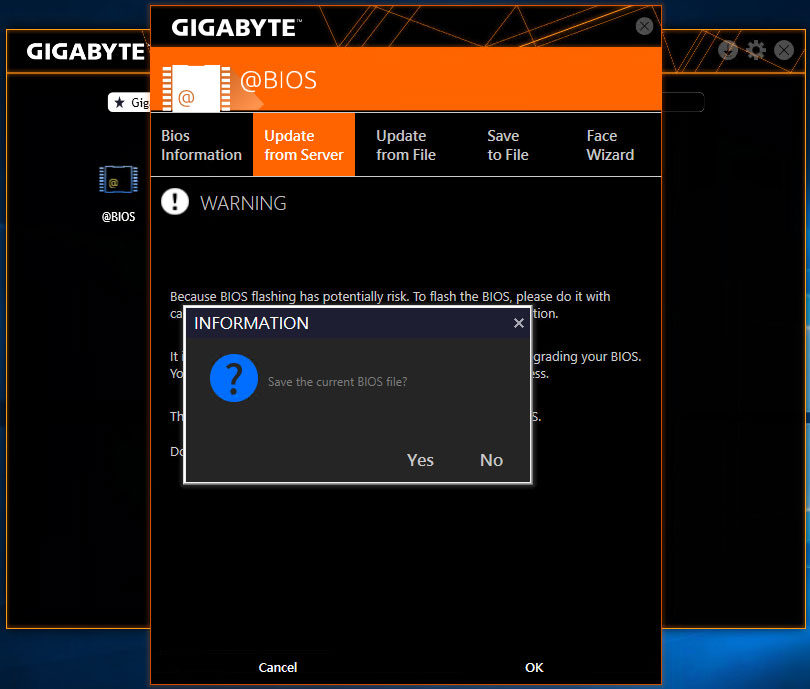
Step 8: Save your electric current BIOS
You will now exist asked if you would like to relieve your current BIOS. This is something you volition want to do equally information technology gives you the power to rollback your BIOS should y'all need to.
Click the Yes button to save your current BIOS to your computer.
Step ix: We accept lift off! Offset the BIOS Update
Finally, its time to practise what y'all came here to exercise and update the BIOS. One time you have backed upwardly your current BIOS, click the OK button to start the update process.
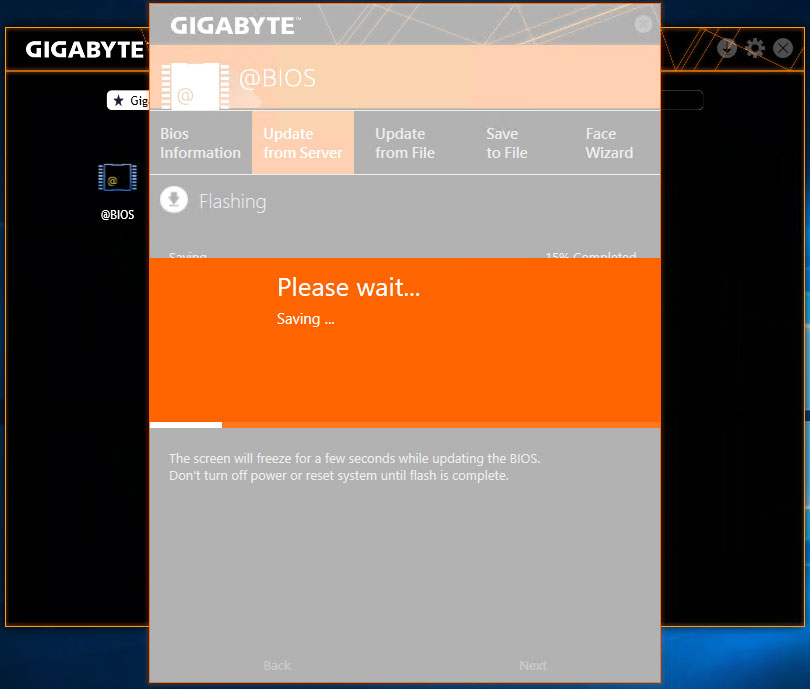
The BIOS update process volition take a few minutes, and your computer will restart during this process. Congratulations, y'all have now updated your motherboards BIOS to the latest version using @BIOS!
In Part 2 of this serial, we will take a look at how to use Q-Flash to update your BIOS. We also swoop into how DualBIOS tin can accept save a poorly flashed motherboard and how to recover your BIOS should things go wrong.
Larn More:
How to Update Your BIOS Role 2: Q-Flash and BIOS Recovery
Source: https://global.aorus.com/blog/How-to-Update-Your-BIOS-Part-1.php
Posted by: littlebincepuld.blogspot.com
0 Response to "How To Update Bios B450 Aorus Elite"
Post a Comment